

Saving time on image re-sizing work
So I found myself resizing images a lot for the headers of each post in this Ghost blog. It isn't a big job but still takes a few minutes each time.
To speed it up I made a script that allows me to pick any image on my computer and instantly re-size it. In this article I share how I did that.
Sadly, this trick is for OSX, (Apple Mac), only and will not work in a Windows environment. Reader beware.
Sizes
The sizes I find myself using are:
- a width of 400 pixels
- a width of 600 pixels
- a width of 800 pixels
- a width of 960 pixels
- a width of 1024 pixels
The height is automatically adjusted proportionally so it isn't listed above
The old way [time: a few minutes]
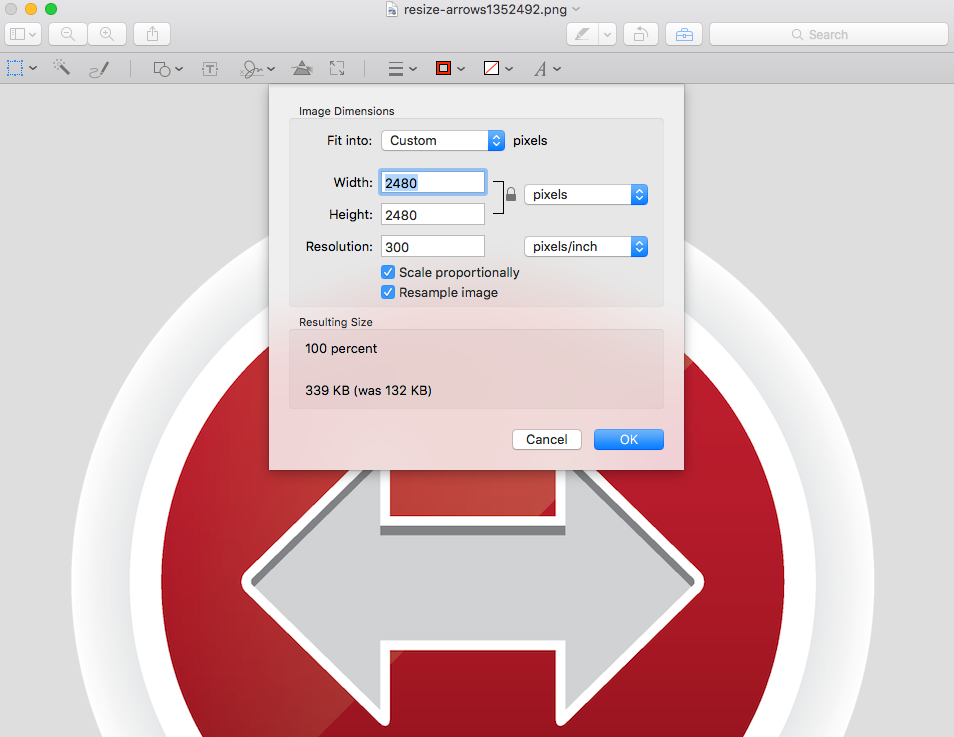
I would open an image program e.g. the OSX Preview app and resize the image there
The new way [time: 3 seconds]
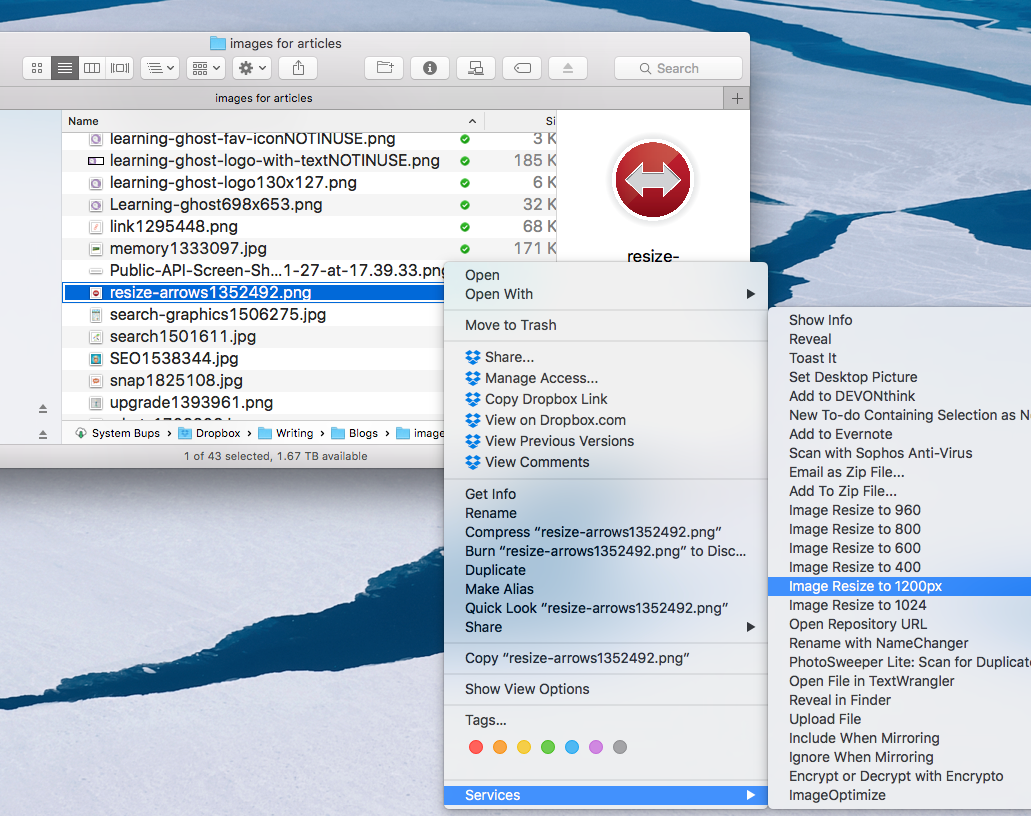
- I right click on the image I want to resize
- Choose a size
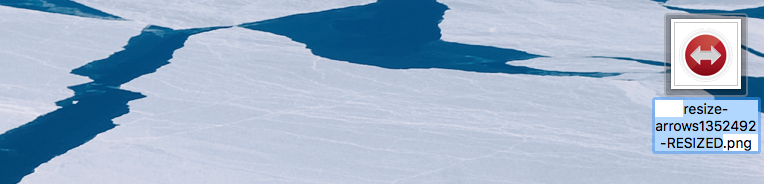
- A new resized image is created on my desktop
Let's get started
Here are the steps:
In this example we will make a resize option that resizes any image to 1200 pixels, renames it and puts the new copy on the desktop. The original is left intact in its original location.
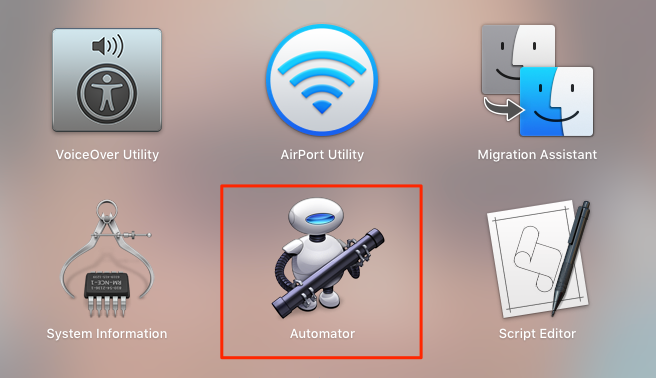
Start Automator
OSX comes equipped with an app known as Automator. New services are created using the Automator application located in the Applications folder on your computer. Double-click the icon of Otto the automation robot to open Automator.
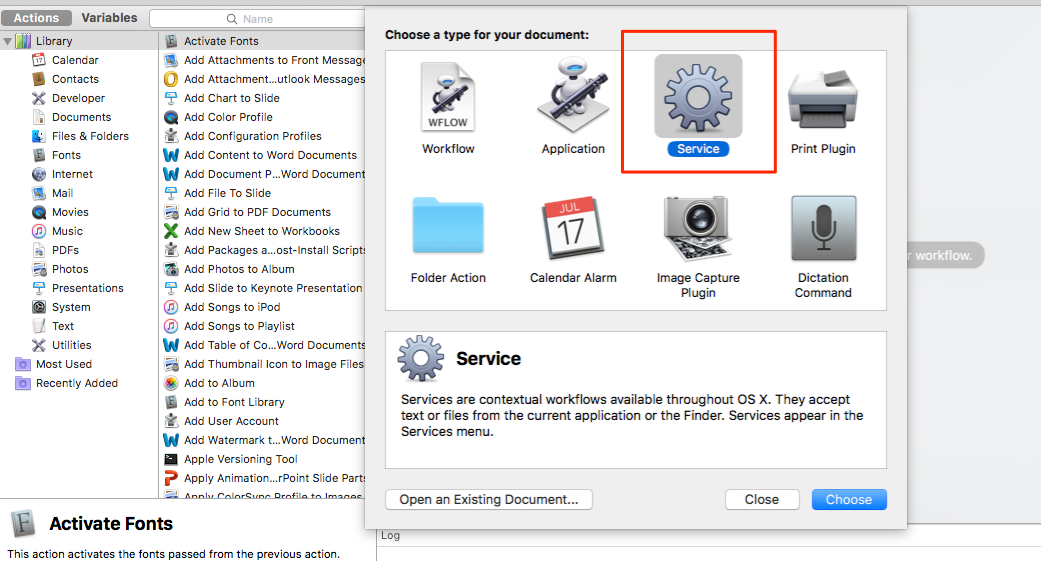
When Automator is launched, it displays a Template Chooser as drop-down sheet connected to the new Automator window. The various template options represent the ways you can deploy the Automator workflow you are creating. Select the Services template and press the Choose button to close the Template Chooser sheet.
Set the input settings
A gray bar will be displayed across the top of the workflow area of the Automator window.
- Choose 'image files' since that is going to be our input.
- Choose in 'Finder.app' since we want to work with image files that we right-click on in the finder

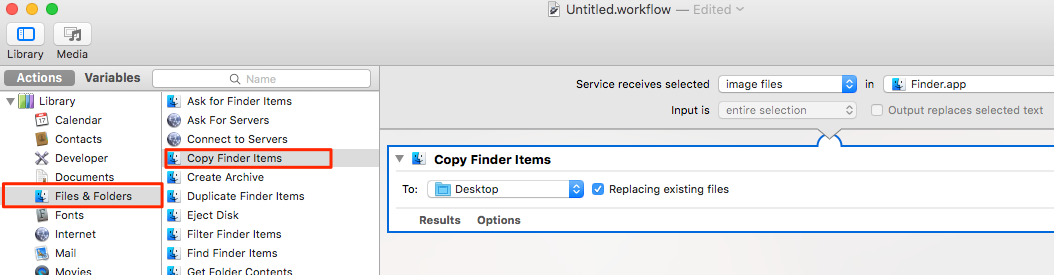
Time to add our actions
We are going to need three actions:
- Copy the image
- Rename the image (optional)
- Resize the image
Copy the image
Click 'Files & Folders' and double-click 'Copy Finder Items'
(Checking the box 'Replacing existing files' is optional)
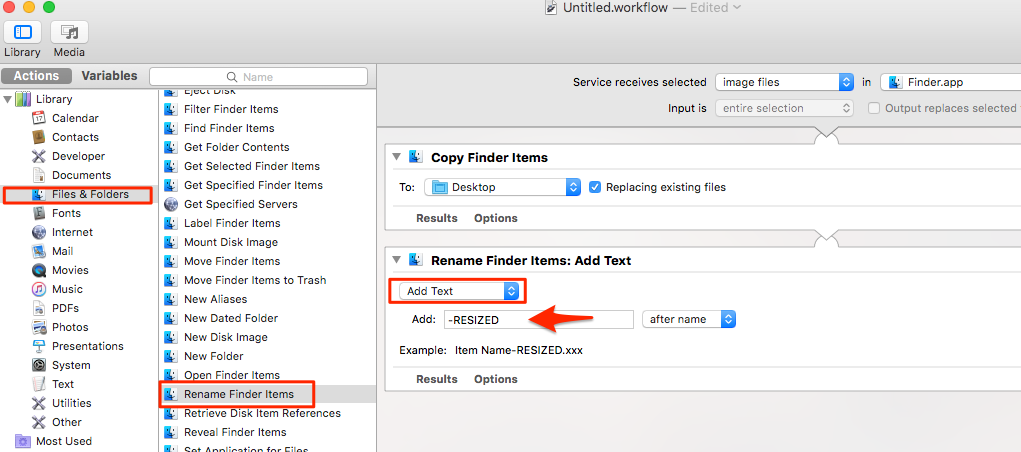
Rename the image (optional step)
Stay in 'Files & Folders' and double-click 'Rename Finder Items'
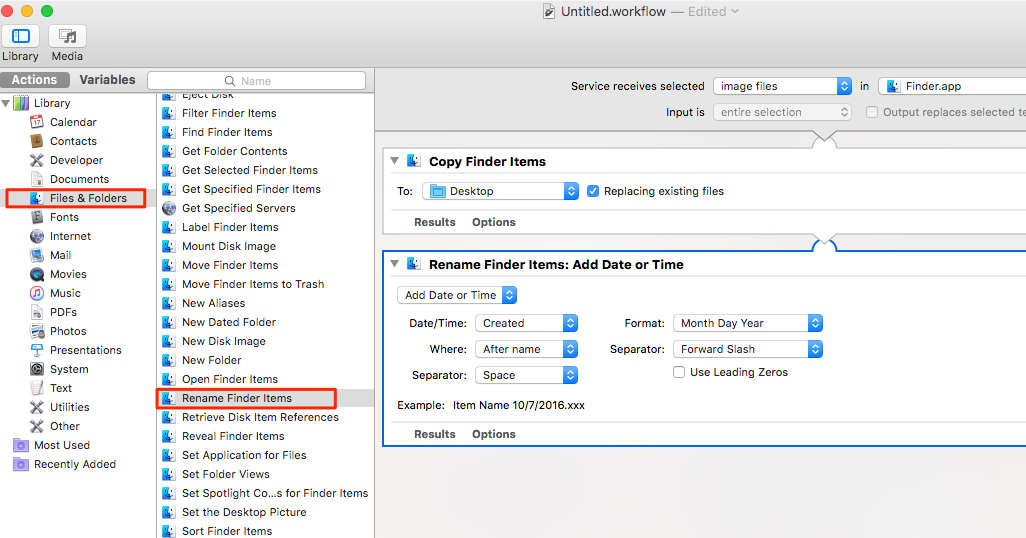
- Change 'Add Date or Time' to 'Add Text' and
- add the word '-RESIZED'
(I do this so that the image has a different name from the original but renaming the image is completely optional)
Resize the image
Click 'Photos' and double-click 'Scale Images' and finally add the number of pixels you want to resize the image to. (in our example it is 1200 pixels)
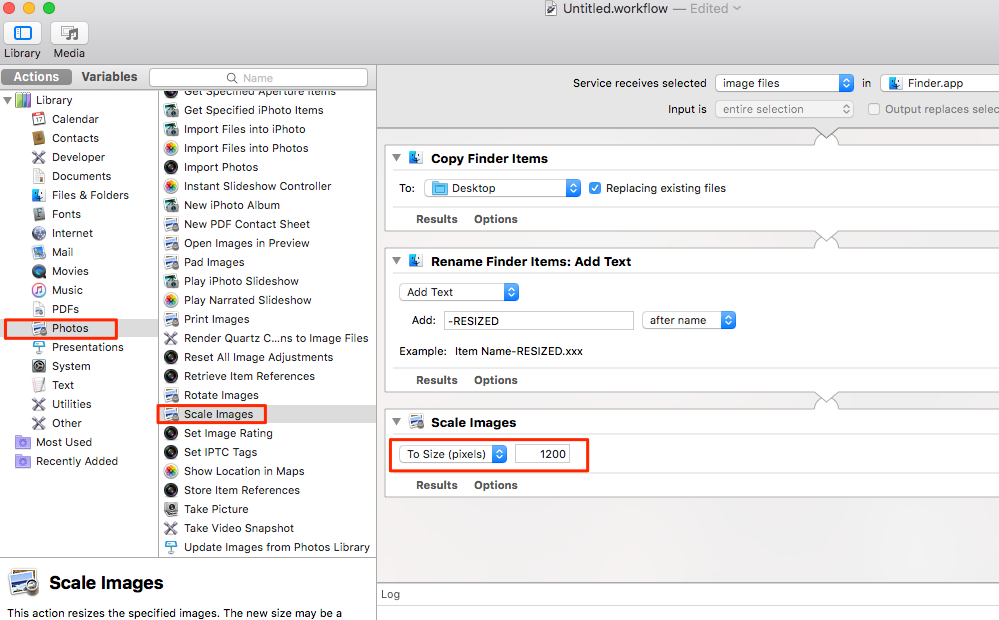
You MAY see a pop-up box telling you: "This action will change the image files passed into it. Would you like to add a Copy Finder Items action so that the copies are changed and your originals are preserved?"
Choose 'Don't add' because we already have a 'Copy Image' action in the beginning of this workflow
LASTLY, name our workflow and save it
Choose Save from Automator's File menu and in the drop-down naming sheet, enter the name for this service, (I call it "Image Resize to 1200px"), click the save button once you are done
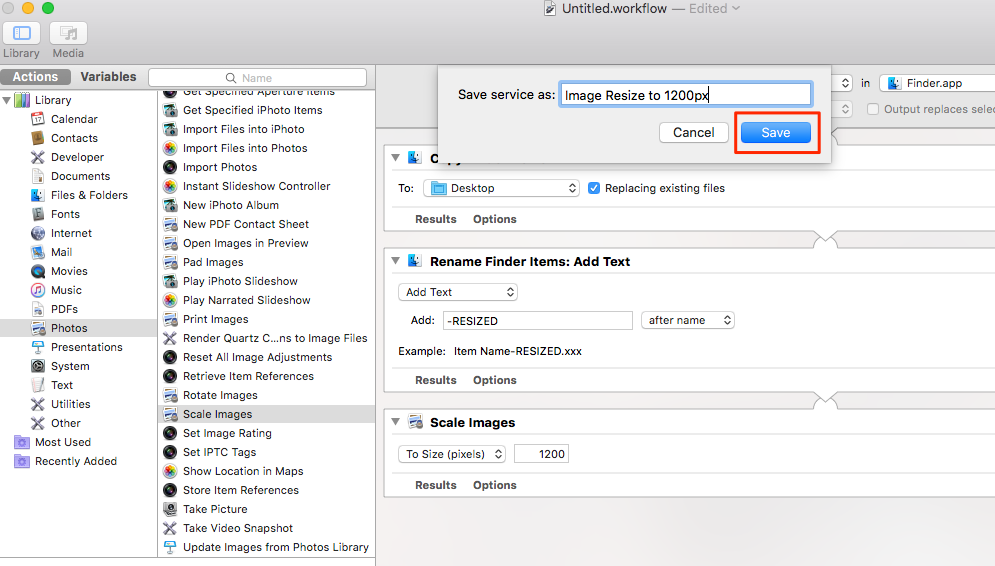
This will effectively save it and install it under the services menu that shows up once you right-click on an image.
Trying it out
- Right-click on any image anywhere in your finder
- choose our new service: Image Resize to 1200px
- watch your new image show up on the desktop, (resized and renamed)
CONCLUSION
There are many ways to improve your workflow and hopefully this could be the first step to making your blogging work faster and easier
If you want to learn more about what is possible with Automator I suggest you read this excellent, (but long), post by Neil North: Automator for Mac OS X: Tutorial and Examples
Reference Links:
https://www.raywenderlich.com/58986/automator-for-mac-tutorial-and-examples