

Background
Every now and then you may want to just copy a Ghost blog so you don't have to set it up from scratch. This tutorial will explain how to do that. That said, this tutorial doesn't go into the 'why' of many commands and instructions.
There are already tons of great ghost tutorials that explain the inner workings of ghost and how to setup a ghost instance. Consider this post more like a reference document on what you need to remember to do when copying a Ghost instance.
WHAT TO UNDERSTAND
- the example is from a DigitalOcean droplet (Ubuntu) but can be used on any linux flavor
- this tutorial will show you how to copy a complete Ghost instance but whether that is the best thing you should do, (instead of starting from scratch), is up to you to decide
- I use this method when I want to make a new Ghost blog using a pre-made Ghost setup and then just make minor changes on the new copy.
- all commands are run as root
In this example we will copy one of my pre-existing Ghost blogs and rename it to 'lab' so I can use it as a test bed, in the future, to try new things on
The components of the instance that we will copy and modify:
- the Ghost directory (holds the database and images)
- the config.js file (the Ghost config file)
- the etc/nginx/sites-available file (nginx settings file for Ghost)
- the etc/nginx/sites-enabled symlink file (activates the settings file, making it available to nginx)
- the start file in the /etc/init directory (used to start the Ghost instance)
Ok, let's do it!
Using unix command line, navigate to the Ghost directory where you keep your blogs.
In my case it is /var/www
cd /var/www
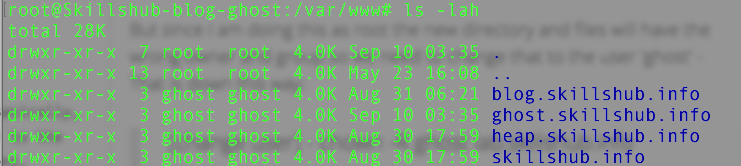
The name convention I use for my Ghost blogs is based on the sub domain name but you can use any name convention you want.
Creating the new blog instance
I am going to copy the directory 'ghost.skillshub.info' into a new directory called 'lab.skillshub.info'
cp -R ghost.skillshub.info lab.skillshub.info
But since I am doing this as root the new directory and files will have the wrong owner and group.

We need to change that to the user 'ghost' - That is down this way:
[change user]
chown -R ghost lab.skillshub.info[change group]
chgrp -R ghost lab.skillshub.info
So now we have an exact copy of our original Ghost blog. Basically, everything your original Ghost instance had is transferred to the new copy. (this includes, same admin login password, content, images and any kind of subscribers)
Changing the config.js file
But we need to change the config.js file to match this new instance of the Ghost blog
Open the config.js file with nano
nano lab.skillshub.info/ghost/config.js
We need to change the URL and the port to match our new Ghost instance
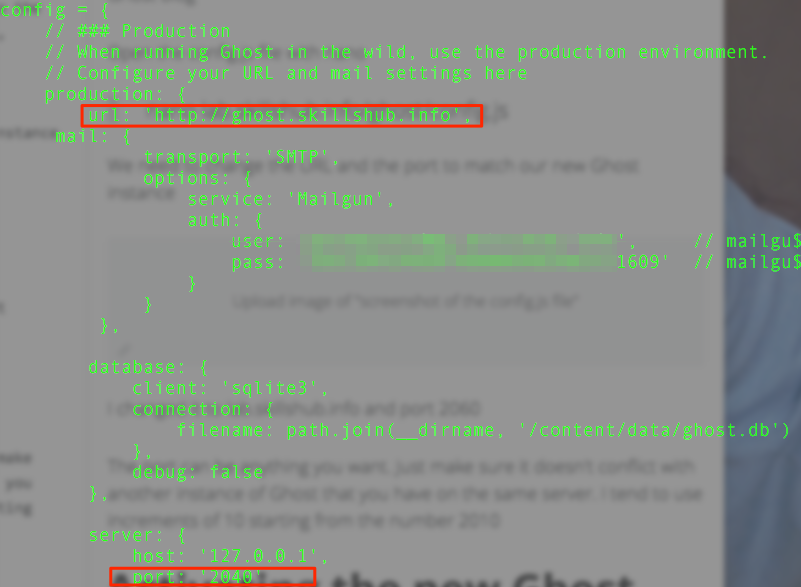
Let's change it to lab.skillshub.info and port 2050
The port can be anything you want. Just make sure it doesn't conflict with another Ghost blog that you have on the same server. I tend to use increments of 10 starting from the 2010
Activating the new Ghost instance
Now we need to activate the new Ghost instance and allow nginx to recognize it.
That is why we need to copy and modify the other files described above. This will enable nginx to start up the new Ghost instance for us. Let's go to the etc/nginx/sites-available folder
cd /etc/nginx/sites-available
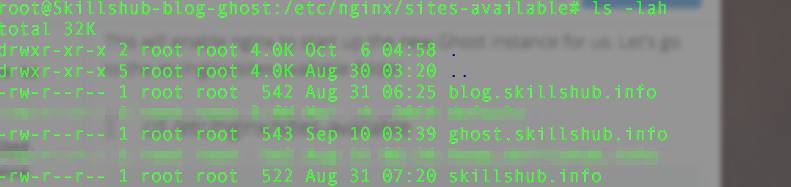
The name convention I use for the nginx setting files is based on the sub domain name but you can use any naming convention you want.
Copy the settings file
cp ghost.skillshub.info lab.skillshub.info
Using nano, let's change the content of this new settings file to match the new Ghost instance
nano lab.skillshub.info
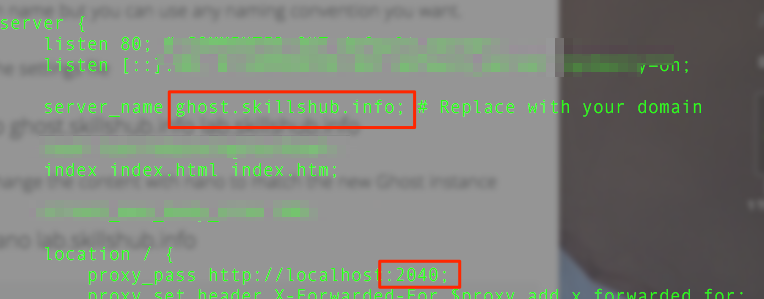
Let's change to lab.skillshub.info and port 2050
Now let's go to the etc/nginx/sites-enabled folder and enable the new Ghost instance, (lab.skillshub.info), by adding a symlink
cd /etc/nginx/sites-enabled
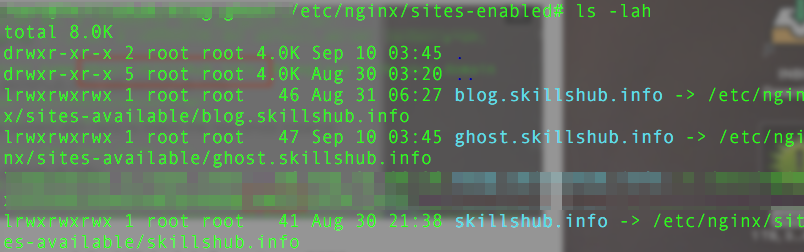
Create a new symlink file to enable the new Ghost instance
ln -s /etc/nginx/sites-available/lab.skillshub.info
Creating the start file for the new Ghost instance
Lastly we go to the /etc/init directory where the start files are kept
cd /etc/init

The name convention I use for the Ghost start files is based on the 'gh-' + sub domain name + .conf but you can use any naming convention you want.
Copy the start file to make a new one
cp gh-ghost.conf gh-lab.conf
Using nano, let's change the content of this new start file to match the new Ghost instance
nano gh-lab.conf
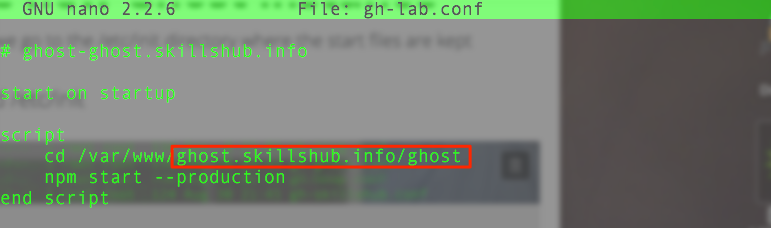
Let's change the path to /var/www/lab.skillshub.info/ghost
YAY! - We are done!
We just need to tell nginx that we have added a new Ghost instance. We do that by restarting nginx.
service nginx restart
Now all we have to do to start the new Ghost instance is use are new startup file, (gh-lab), and run this command:
service gh-lab start
THE GOTCHA'S
DNS - You have to remember to set up a new sub-domain for this blog so that you can see it. That is explained at the bottom of this post.
ADDITIONAL INFORMATION
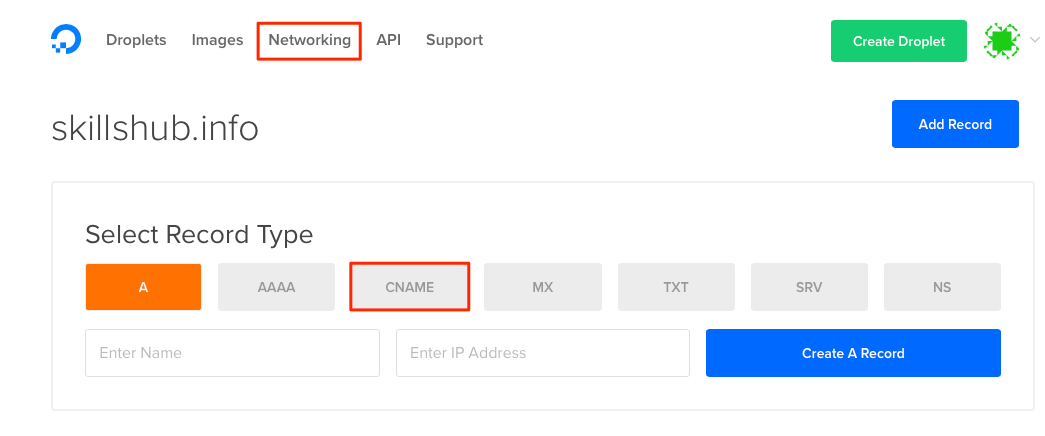
DNS MUST BE SETUP
Since I created a new Ghost instance that will live at the URL: lab.skillshub.info we need to make sure that the 'lab' sub-domain is set up. On DigitalOcean Droplets that is done through the Network tab of the admin Panel. We need to create a new CNAME.
You can read more on how to setup all things DNS on DigitalOcean here:
https://www.digitalocean.com/community/tutorials/how-to-set-up-and-test-dns-subdomains-with-digitalocean-s-dns-panel
If you have a different hosting provider the procedure is pretty similar. Just find the DNS admin panel that your hosting provider offers and make your changes there.
ONE LAST REMINDER: when copying a ghost instance, the components that need to be modified are:
- the Ghost blog directory (holds the database and images)
- the config.js file in the ghost directory (the Ghost config file)
- the /etc/nginx/sites-available file (nginx settings file for Ghost)
- the /etc/nginx/sites-enabled symlink file (activates the settings file, making it available to nginx)
- the start file in the /etc/init directory (used to start the Ghost instance)
Reference Links:
https://www.digitalocean.com/community/tutorials/how-to-set-up-and-test-dns-subdomains-with-digitalocean-s-dns-panel