

What is this used for?
It is used to allow your users to contact you without you having to reveal your email address on the site.
Why set up this functionality?
Once users fill in the contact form, you'll get a notification via email with their message. And if you use an embedded form solutions provider, you'll get access to a form builder and a basic admin panel that keeps track of the users filling in your contact form.
What to understand
① There are many embedded form solutions available, all of which can be integrated in the same way. I picked new form provider: Paperform. (They easily blow most other providers out of the water)
② There are providers that are free and there are those that incur fees. Some are more expensive and some are cheaper. I'd say Paperform lands in the lower end in terms of cost but high up there in terms of quality. Basically GREAT value for money. At the end of the day you need to do your own research, just remember: you get what you pay for.
③ The wonderful Ghost folks made a tutorial using a different provider - 123ContactForm.com. Below tutorial is based on theirs but using Paperform instead.
How long will it take?
It took me 10 minutes and was very easy to do.
Ok, let's do it!
Login to your Ghost blog
Using your admin user credentials, log in to your blog.
Create a static page
This page will be used to house your contact form on.
- Click on "New Post" from the top of your admin navigation menu
- Provide a title for your page
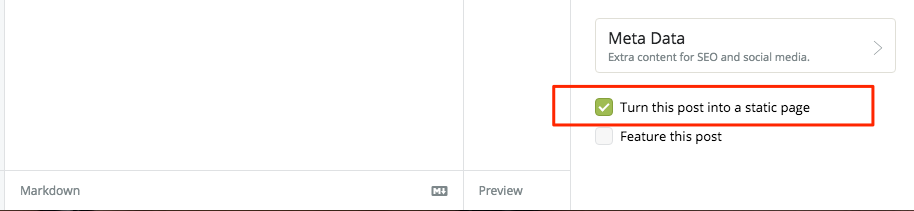
- Edit the post settings of your page by clicking on the "gear" icon next to the "Save draft" button and check "Turn this post into a static page"
- Publish your static page
Take note of what your static page's URL is. For example, if your contact page is called "Contact Us," the page URL would be /contact-us/. You will need to use this page URL in a later step.
Create a custom page template
In our theme folder we need to create template for the static page we just made. The fastest way is to copy the template 'page.hbs' and rename the copy to 'page-contact-us.hbs'. This way we can re-use all the code that is already in 'page.hbs'

Page templates must always start out with 'page-' and then include the page URL after the hyphen. So, for example: If you have a contact page with a page URL of "contact-us" your page template name would be "page-contact-us.hbs"
Create an account with Paperform
Go to Paperform Signup. Get yourself a free trial account and by using this link you'll also get 10% off FOREVER!
 To see pricing and what is included on the free trial, click here: Paperform's Pricing
And make sure to use this link to get 10% off FOREVER, on the prices listed.
Make a contact form
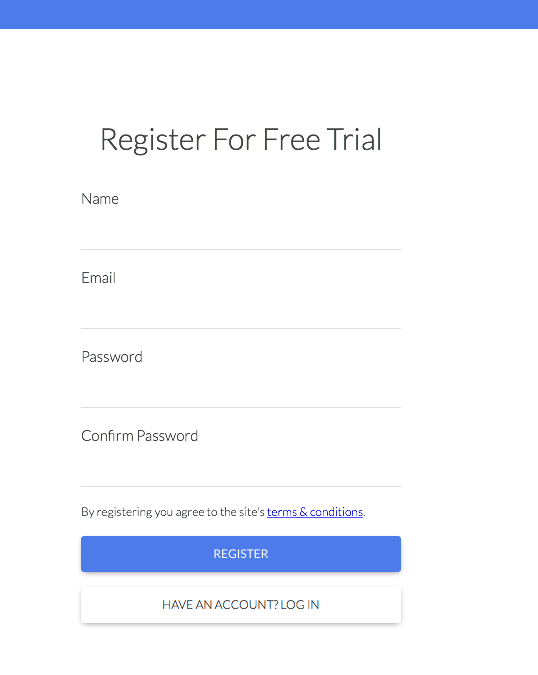
Once you have created your account, go ahead and make a contact form. This tutorial does not cover that but you'll find it is amazingly simple using Paperform's intuitive interface. Here is a good tutorial made by the awesome Paperform folks', showing how to make a simple form.
Access the form embed code on Paperform
To make the form appear on your Ghost blog, you need to copy the javascript embed code. This embed code will need to be pasted into the page template we created earlier. ('page-contact-us.hbs')
Edit your form and click 'Configure
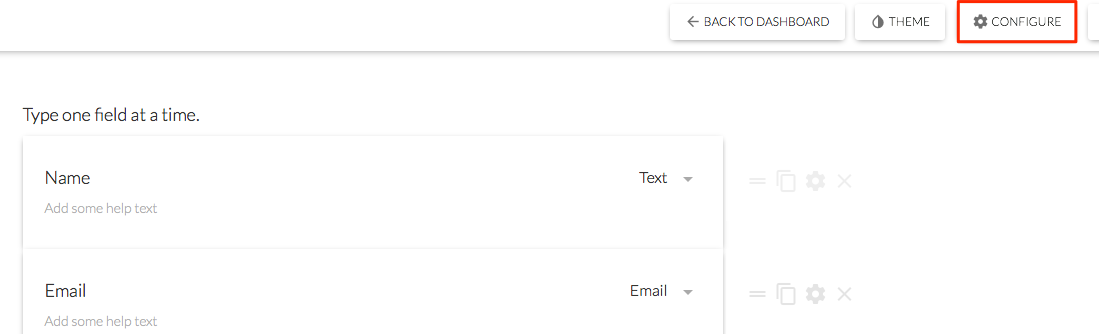
go to 'Embedding' and grab the 'Inline' code

If you grab the 'Full screen' code your users will not see the form 'Inline' on your page but the form will instead take over the whole screen. If that is the effect you prefer, go ahead and use the 'Full screen' code.
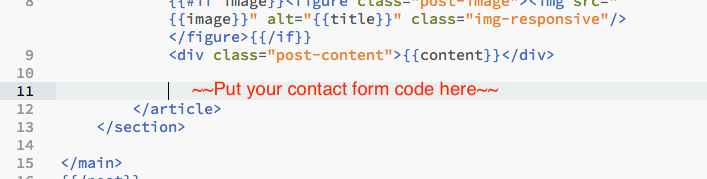
Paste the embed code into your page template
Depending on where you'd like your form to appear on your contact page, you'll want either paste the form embed code before or after the {{content}}. E.g. if you'd like the form to display AFTER your contact page content, you would paste your form code after the bit of code that looks similar to this:
THE GOTCHA'S
RESTART GHOST - You have to remember to restart Ghost, once you have finished making changes to the 'page-contact-us.hbs' file.
ADDITIONAL INFORMATION
Why did you pick Paperform?
Because they blow any other form maker out of the water and I have only good things to say about them. Their pricing is very fair and doing the setup was easy and painless. Embedding their code was faster and less confusing then adding e.g. a Wufoo form. Also, I find that the new contact form loads faster and is definitely prettier! Click here to see the contact form
Lastly, Paperform is a small business from Australia run by some GREAT people that listen to their customers and make changes quite fast. Their platform has more logic and functionality than e.g. Wufoo.
Here is a good overview of Paperform you can take a look at.
What about a free option?
You can use both 123ContactForm.com and Wufoo.com In fact I wrote another tutorial a while back showing how to setup a Wufoo form on Ghost.
That form is a bit old school but not too bad, You can judge for yourself here: Wufoo Contact form
Reference Links:
http://academy.ghost.org/adding-a-contact-form-to-your-ghost-blog
https://www.ghostforbeginners.com/adding-a-contact-form-to-ghost-with-wufoo
https://paperform.co/